Photos by Venita Lake
A very long time ago, Venita asked Rick, “What do you do when you have finished building your layout?” While there are lots of possible answers to that question, a better question would have been, “When do we start planning and implementing operations on our model railroad?” Even if you only want to build a small oval or a static diorama, your project will be greatly improved if you consider how it would work as a functioning railroad business.
So Rule #1: Start planning operations now. Wherever you are right now, whether you are just beginning to think about having a layout, looking at track plans and other actual model railroads, evaluating where you will/could/might build one and what you can/might/wish you can afford, or inheriting an already-built empire, it is time to start (or evaluate what you have been doing) right now.
Even if a train runs in a circle around the Christmas tree, at some point someone with imagination will want to stop the train to pick up or drop off passengers or freight. Add a bridge, a station, a factory, or stockyard. Decide if you like steam or diesel or both, whether you want black or blue or red and yellow engines. Is there some part of the country or world you want to model or would “anywhere” work for you?
The following is how we developed our operations through several phases of building our railroad–not just a layout, but a real business based on how it would operate efficiently, realistically, and with one or many individuals working together. We hope some of our experiences will give you some useful ideas, even if you do not want to follow every step or stage that we have taken along the way.
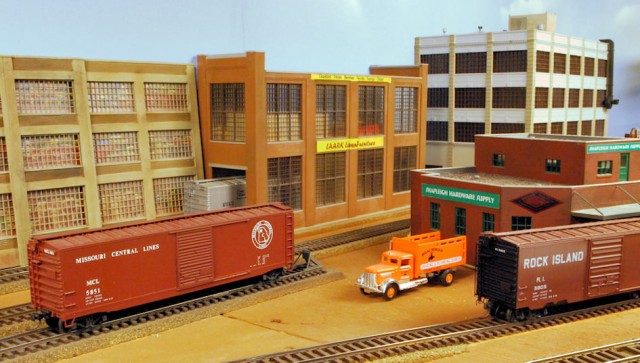
We had already started a layout, moved twice, then started another, and tore it out. Rick has a long history of railroaders in his family, grandfather and grandmother, and his dad had worked for the Rock Island, so they were transferred from Kansas to Iowa, Illinois, Arkansas, Texas, Oklahoma, Missouri, and back to Illinois. Rick had worked as a switchman and fireman in the Armourdale yard in Kansas City summers and on-call while in college. The CRI&P was a given. Returning from a regional convention in Iowa, we pinned down Arkansas and Oklahoma, which he remembered best and decided to become the El Dorado and El Reno Railroad (Arkansas and Oklahoma) but with interaction with the Rock Island in both of those towns as well as others. With both of us involved the “eL & eL” seemed appropriate. Several scouting trips and conventions (Mid-Continent and Rock Island Technical Society) along with Richard Schumacher resulted in a workable map that could be developed into an ambitious model railroad in our basement. (It’s still a work in progress.) Rick and Richard were quite excited to discover Rich Mountain in western Arkansas near Mena, now on our railroad.
So we already had stuff, some built, some not, most appropriate to what we wanted to do. And we kept buying more stuff. And we were learning more about computers and how others were operating.
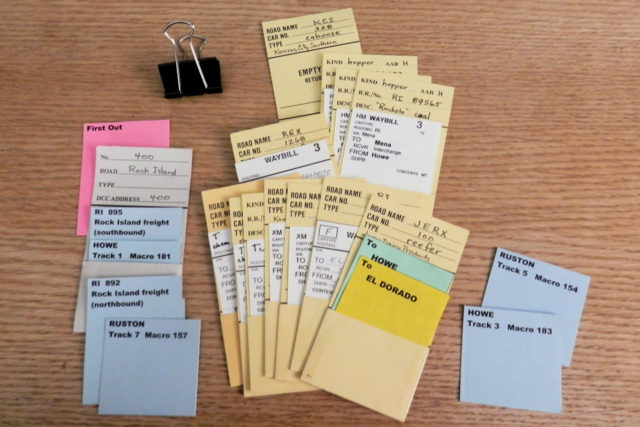
Rule #2: Organize what you have and what you should or should not purchase as soon as possible. We liked the car cards with pockets and waybills that many modelers were using. So, not in any required order, but one of our first projects was to make cards for every completed piece of equipment. Micromark became a favorite source (#82916 starter pack). These professionally made cards have spaces for road name, car number, type of car, and some for description with a pocket to hold waybills and other types of cards.
For cars where we knew other information, we added notes on the back: kit maker, cost, other identifying marks or with permanent loads. It is important to print information carefully or draft someone to do it if your writing is illegible! Make a card at the same time that each new car is tuned–properly weighted, checked for coupler height, etc. Although it is not necessary, but nice, we developed a computer inventory with separate files for engines, cars, structures, details, tools. So maybe we went overboard, but we learned a lot about computer programs and what we had and what we didn’t need more of.
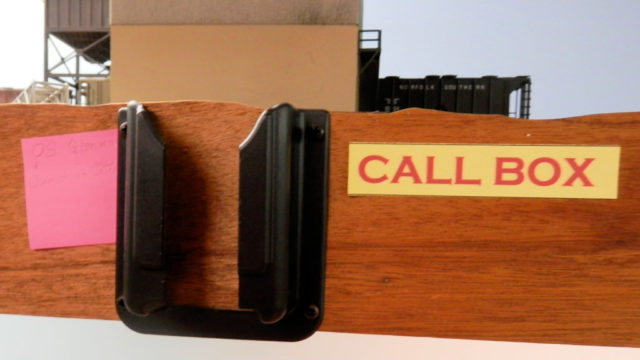
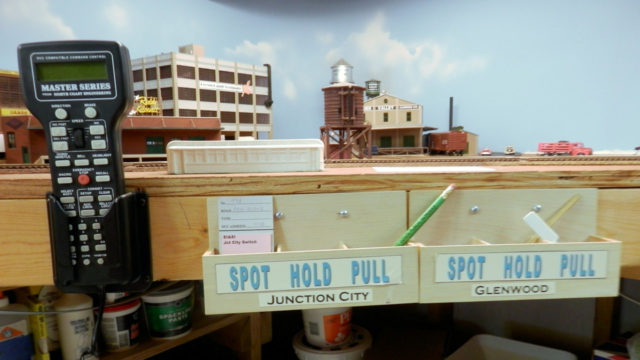
Rule #3: Consider physical layout to enhance operations by multiple operators. Our home was built in 1913. It has a comparatively low ceiling with large overhead pipes for its hot water radiator system. The floor has its ups and downs to accommodate two floor drains, now hidden by carpet. Support beams and vertical supports are absolutely necessary to support three floors of brick construction. To design double-deck benchwork limited in depth for 5-foot tall Venita and include lots of operation possibilities, the aisles were limited to a width of 28 or 30 inches except for two spots at only 21 inches wide. Step stools are strategically placed. Car card or bill boxes on the front fascia proved useful (Micromark 82914). Long bolts with wing nuts placed above the middle dividers allow us to easily relocate them if needed. Cab holsters (84074) on the fascia free up hands. We chose to supply our own hand-held radios.
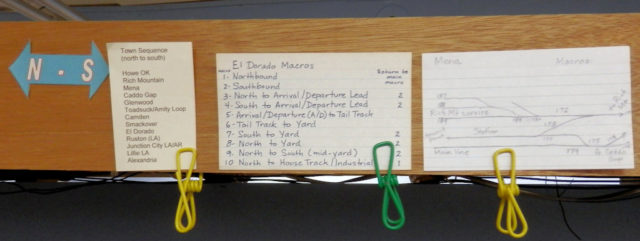
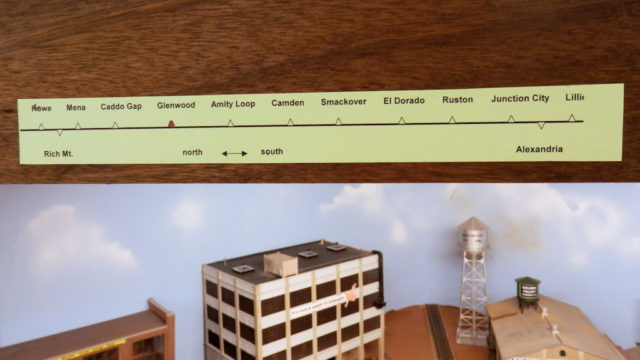
Our choice of an NCE operating system went against the most popular local choice at the time, so we have purchased a sufficient number of handsets for operators. The method of using macros to throw switches, even along a series of turnouts, is simple to learn. And, a set of diagrams on the fascia at strategic points illustrates which macro to choose. Other fascia arrows indicate North–South or South–North directions. Yes, we go against the usual east–west because that’s the geography for our part of the country. And each direction is true at some point on the system. Other linear signs list the stations in order with a “you are here” arrow. Printed signs are attached to the fascia with double-faced tape.
Shop aprons from Home Depot, lanyards, small 6×9-inch clipboards, coupler picks, and pencils are available to operators. This avoids operators placing materials on the layout itself or requiring three or more hands.
Rule #4: Be flexible about the need to make changes or try something different. We learned a lot from visiting and operating on different railroads, observing both good and bad. We kept copies of forms and operating instructions from other model railroads, collected railroad timetables, and studied maps.
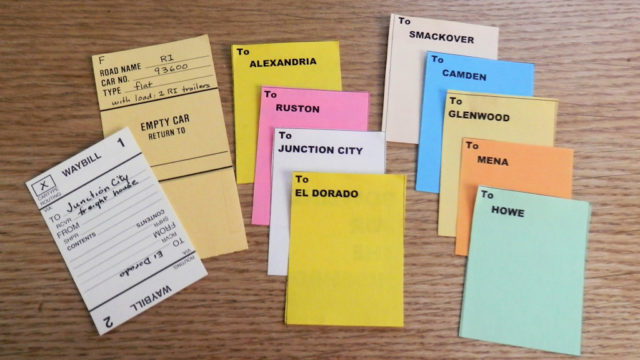
Waybills: We started with a bare minimum of printed materials. To begin, rather than use the purchased four-sequence waybill cards which have spaces for To + Rcvr, From + Shpr, and Contents for each move, we quickly printed destination sheets on different colors of paper for each town.
A Microsoft Word document set with ½ inch margins leaves room to Insert a table with four two-inch columns across, the same size as the printed waybills. Add three 4-inch or four 3 ½-inch rows stretched to the bottom margin and use Table Tools + Layout to distribute the squares equally. (Mark “borders and shading” for “all” to make cut lines. You may want to save the blank form at this point. We eventually used this page layout for other things. Then enter “TO” plus the town or city name in the first square, do a copy-and-paste in the remaining squares and print several copies. Choose a different color of paper and then do a find-and-replace for each other town or destination. If you aren’t lucky enough to have lots of old colored flyers from schools or your neighborhood organizations as we did, print the names in different colors or borders. Cut the squares apart using an inexpensive paper cutter from the craft store, a metal ruler and razor blade or Exacto knife not used for modeling, or scissors (though they take more time.) You now have a deck of destinations.
Now for the fun. The oil train obviously stops at the refinery in Smackover, so in our case that tank car gets a light pink “Smackover” slip. From there it will go north to Howe yard (green) and points beyond off the layout. But one tank car gets dropped at Camden and another, some other time, at Glenwood, both before they go to Howe. Put green Howe cards in pockets of three tank cars. Put yellow in one for Camden and a green one behind it for Howe. Put an orange one for Glenwood and a green Howe card behind. Or send that Glenwood car back south to the refinery again. As each temporary card is moved from front to the back of the deck in the car pocket, a logical pattern evolves. This is an easy one. Other mixed trains are more interesting and may require writing in the appropriate industry on the paper waybill. And eventually we began to fill in those purchased waybill cards.
Another variation that could drive you nuts was that we used the same basic grid to develop 4-position waybills. This involved learning how to put cardstock through the printer four times, because we never figured out how to print positions 2 and 4 upside-down from 1 and 3. And we soon gave up on printing different patterns on the same page. We did, however, print some full pages of frequently used patterns for blocks of cars.
Often an operations session is done with only a deck of card-carrying pockets and each operator runs his or her train checking the deck to see what cars are to be dropped at each location and checking the cards in a bill “pull” box for any cars that are headed in the assigned direction. The cards are left for drops or picked up to go along with the corresponding car.
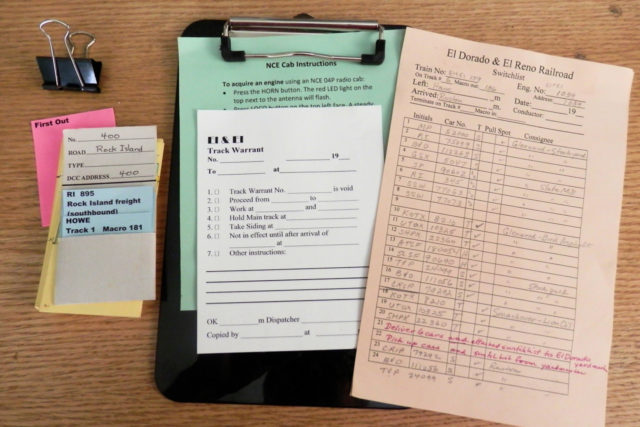
Because we also were headed to putting together a set of cards for a specific train, we used the basic form for engine cards. The standard engine pocket identifies engine number, road, type, and DCC address, for example, No. 400, Rock Island, diesel, address 400. We added a shorter card giving the train number such as RI 895; name, Rock Island Freight (southbound, an odd number); and an even shorter card, its current location and the macro number to leave the yard, HOWE, track 1, Macro 181. For this regular train, another set of cards remains behind it: RI 892, Rock Island Freight (northbound, an even number), at Ruston, track 5, Macro 155. These were printed on card stock rather than paper.
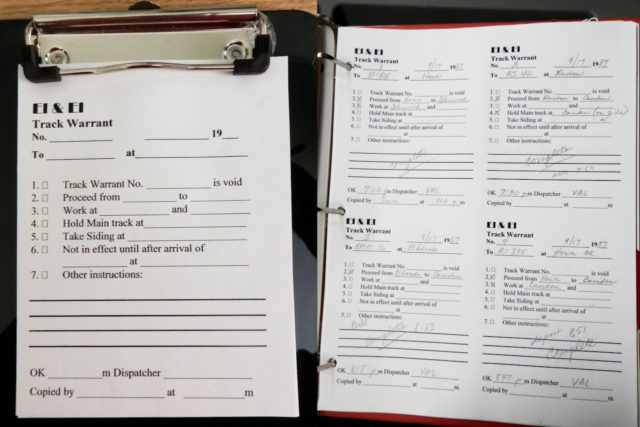
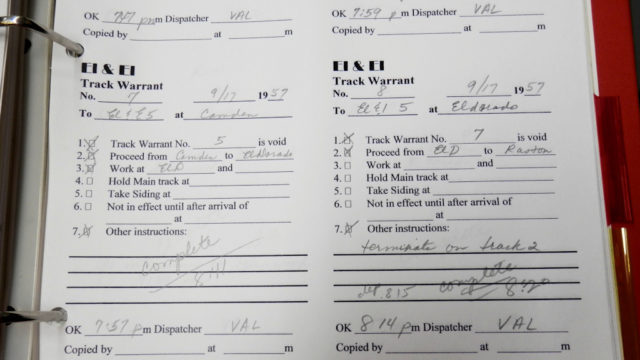
Track Warrants: Because we have a dark railroad, no signals, we wanted to have a dispatcher issuing track warrants, a “permission slip” giving the engineer/conductor rights to move from one point on the railroad to another.
These orders would be delivered via hand-held radios which can be heard by everyone operating, provided they are listening. The engineer must report in to the dispatcher at the destination and often at interim points along the route. The dispatcher must determine which train has priority over the main track according to certain rules but is not concerned about movement when it is in a yard or siding. Each warrant is recited by the dispatcher, spelling out names and numbers, as the engineer checks off or writes orders on a warrant form and then reads it back. This is a critical safety issue.
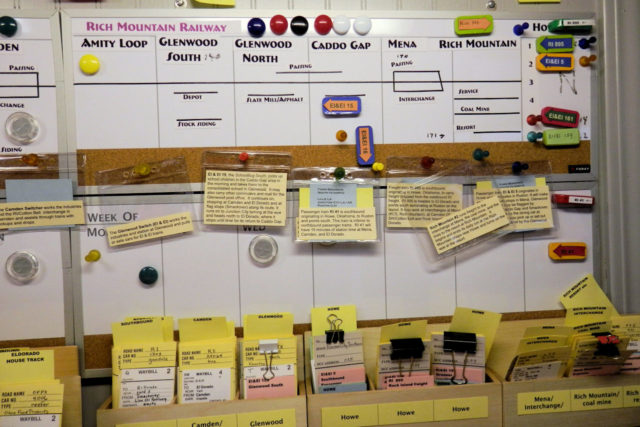
The dispatcher maintains a sheet of the stations or other important locations on the system and marks each train’s progression. This is why the engineer checks in periodically or OS’s, meaning either On Site or On Sheet. And so, several other forms were created. We made a simple paper grid version of the sheet with place names or stations listed down the left side and train numbers heading columns across the top. The dispatcher marks the departure point and the destination in the appropriate squares and as the engineer reports arrival and departure at interim points, the dispatcher marks the sheet clear, allowing other trains to enter that track. We now have an alternative, a magnetic board and labeled magnets to record each train’s location. Office Depot is another favorite!
The Switchlist: As things progressed and to make car card juggling less of a problem, we began to write up switchlists. These are prototypical and take relatively little time to write up. We usually write them ahead of time Some modelers prepare their own list if they are only given the cards on other layouts. Our lists are half-sheets, 8½x5½ in. Column labels are initials, car no., T (for type of car), pull, spot, and consignee. At the top, we have added train number and engine number and address, spaces for the beginning and final location and time, date, and conductor/engineer. They are attached to a small clipboard along with several track warrant forms and a set of NCE cab instructions.
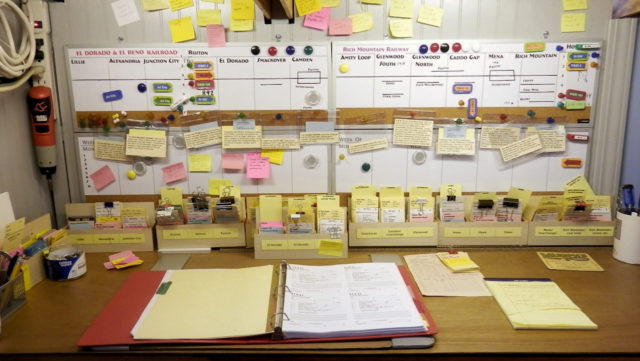
In our latest phase of developing operations on the El and El, we stopped giving the operators the deck of car cards! They receive only the switchlist. Instead the dispatcher or a clerk maintains the decks in separate card boxes on the desk.
We do not reset the trains between sessions except for trains that must be reversed in the Howe yard on the upper level so that they are headed southbound. (Space limitations necessitates backing out a train and bringing it into the opposite end of the Howe yard.) Basically, cards are moved into the new card box location either during the session–or afterward if needed. After each session we do check that everything got to the right place–no oil tank cars allowed in the stockyard!

